
Add your first property
Inventory in Stay n Host has three layers, and getting them right once means never fighting them again:
- A property is a building or site - an address with photos, policies, and house content.
- A listing type is a category of unit inside it - Studio, One-bed Deluxe - with shared photos, amenities, and base pricing.
- A listing is one sellable unit - the actual apartment a guest sleeps in, with its own calendar and door codes.
If you manage single homes, you’ll simply have one listing type with one listing per property - the layers are still there, they just stay thin.
-
Open Properties in the rail and click New property. Give it a name and address. (Today’s setup checklist takes you to the same place.)
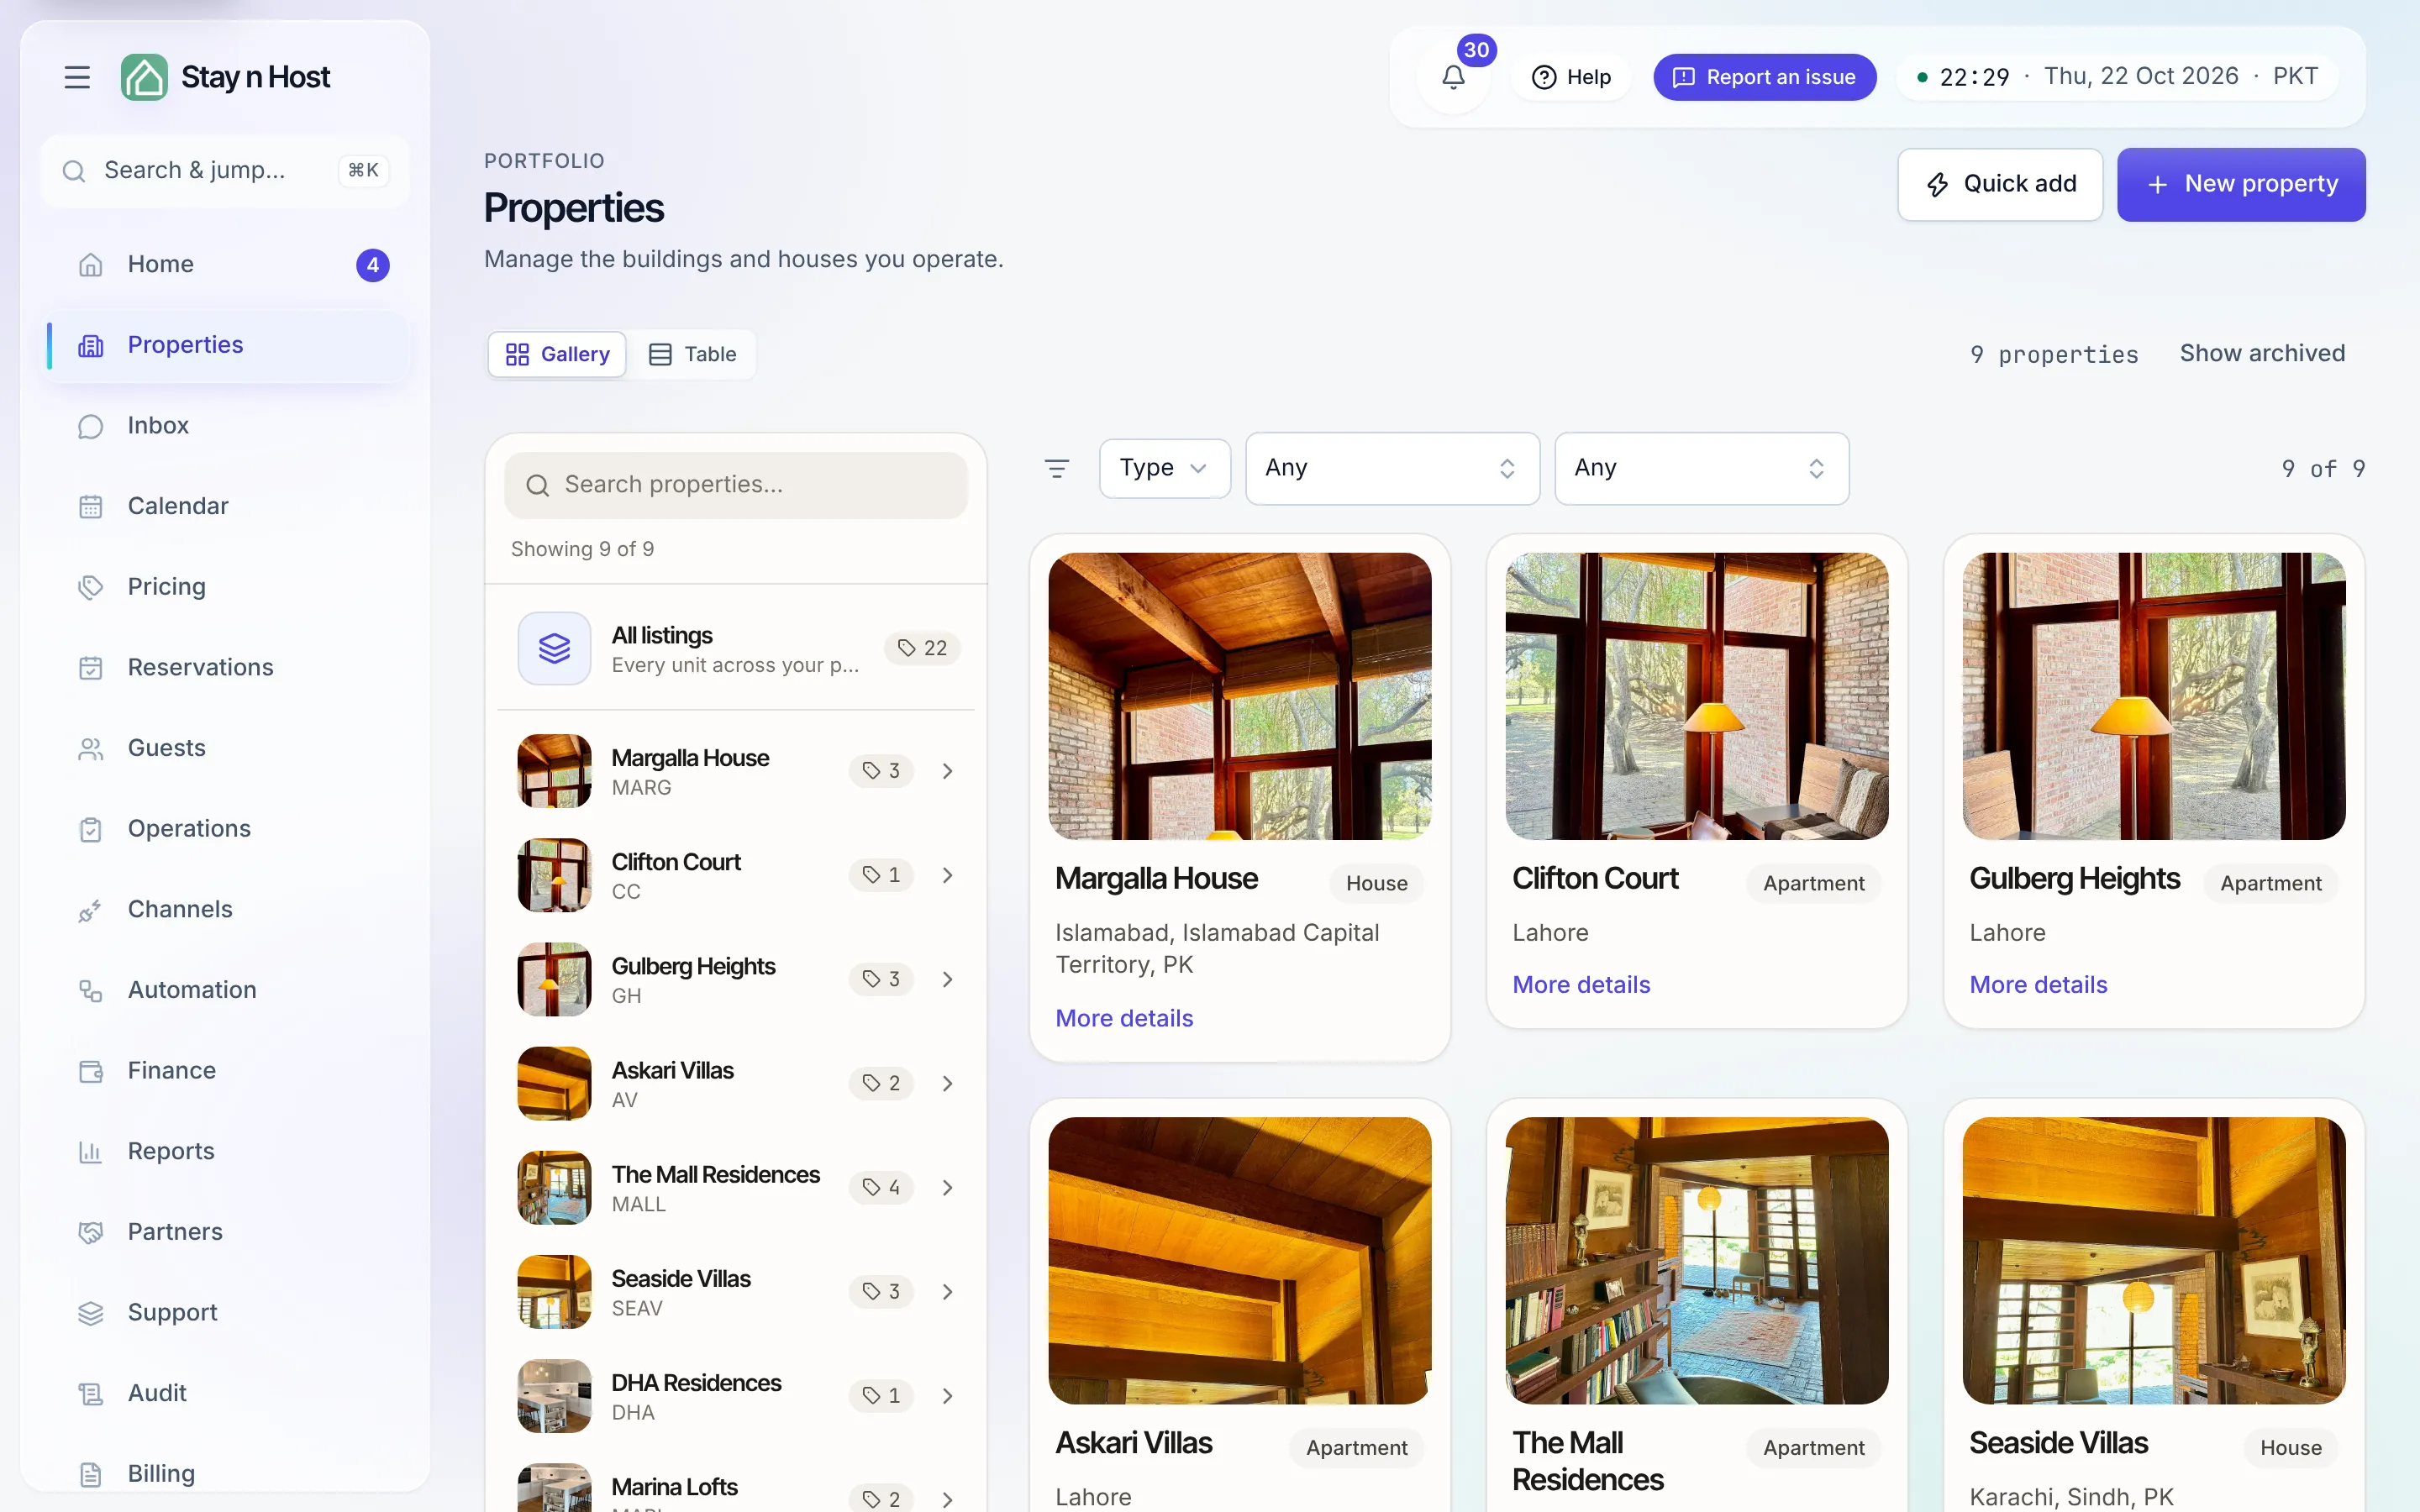
-
Create a listing type on the property’s Listing types tab. Set the sleeping capacity, amenities, and photos that all units of this type share.
-
Add a listing on the Listings tab - the sellable unit itself. Name it the way your team talks (“A-302”), pick its listing type, and it’s on the calendar immediately.
-
Fill in Content & policies. House rules, check-in/out times, arrival instructions, Wi-Fi - content set at the property level flows down to every listing unless a listing overrides it, so write it once, high up.
-
Set the Policies and Quotations tabs. The refund ladder (how much a guest gets back at each notice period) and the quotation footer (terms printed on every quote) live per property.
What’s next
Section titled “What’s next”A unit you can sell needs a way to get paid for it: Set up how you get paid.